Showing posts with label artist. Show all posts

Thursday, May 4, 2017

Mixed Media Resist: Vaseline & Stencils - Creative Team Thursday with Kristin Van Valkenburgh


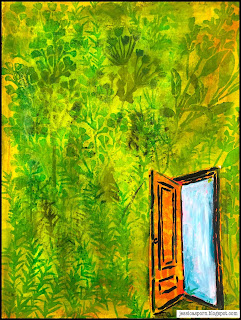
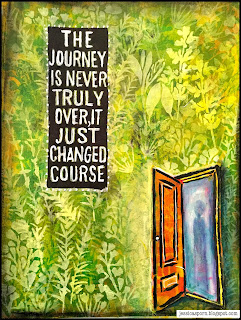
“We keep moving forward, opening new doors, and doing new things, because we're curious and curiosity keeps leading us down new path.” — Walt Disney

It’s my turn again! And I can’t wait to share with you an old-ish technique that I’ve been experimenting with lately.

Like many of us, I’ve been in love with Mixed Media for what seems like a lifetime and as a result, there aren’t any tips or techniques I haven’t tried. I love anything that creates texture or visual interest, and will literally swoon over something as simple as messy cracks or crevices on a project or page.

One of the first Mixed Media processes I learned that creates cracks and crevices is the “Peeling Paint” technique which uses Vaseline as a resist. Have you ever tried it? It’s quick, easy and uses what you already have in your medicine cabinet.

But. . . . I’d never experimented with pushing it through anything - not to mention a stencil - before now. To be honest, I wasn't even sure it would work! But work it did, and I must say, the results are pretty cool.

Check it out for yourself, and let me know what you think! The whole process can be found below. And stay tuned to the end to see a (really fast) tag I made using the technique.


Your turn!

Have fun and stay sloppy,
Kristin xo!

Stencil Used: “Borders 9J Stencil” by Jessica Sporn for Stencil Girl
http://www.stencilgirlproducts.com/product-p/l089.htm


A childhood obsession with Hollywood starlets led to an early life in the theater, where Kristin Van Valkenburgh spent many happy days on set and behind the scenes as both an actress and makeup artist for the stage. Kristin has a passion for all things mixed media and loves to create whimsical pieces with lots of layers, bright, poppy colors, big eyes and positive affirmations. Her work has been featured in numerous Stampington publications including Somerset Studio, SomersetStudio Gallery, Somerset Life, Somerset Apprentice, Artists’ Cafe and Art Journaling.  


You can find Kristin on her blogYouTube, Facebook and Instagram.

THANK YOU KRISTIN!
To see all of the Creative Team posts, click here!


         Visit Stencil Girl Products and RubberMoon Stamps to see all my designs!


If you haven't already - please connect with me here:
Your comments make me so happy and let me know you were here. I read and treasure every comment and will happily answer any questions as soon as I can.

If you are entering a GIVEAWAY, please add your email address in the event I need to contact you.

To avoid SPAM, please write it like this: jessicasporndesigns (at) gmail (dot) com

Thank You!

Tuesday, March 14, 2017

Five Ways to Rescue an Art Journal Page

If you're like me, you sometimes abandon an art journal page or project because you think it can't be saved.  Recently, I had just such a page, and searched "ways to rescue an art journal page."  Funny enough, the search led me to MY OWN POST from about a year ago!


Since I didn't even remember I had created it, I thought it would be useful to repost it!  Enjoy.

We all have pages in our journals that we hate.  Either the page didn't turn out as we planned, or we had an "accident" on it - something spilled or a product was expired and didn't react as it was supposed to.  Here are five ways you can take such a page and turn it around. 

1.  Make your background your foreground.  Use gel medium through a stencil, let it dry, and then gesso over the rest of the page.  Wipe the gesso from the gel'd areas with a baby wipe, leaving your background peeking through.  You can add journaling over the gesso, or just keep going with another technique.   

You can watch a video of this process here by Peerless Designs.

Stencil used: Eastern Lotus and Leaf Repeat
 2.  Add lots of layers using the same stencil or stamp.  Using the same stamp or stencil, first do a layer of really dark color.  Then use a lighter or neutral color.  Finally, use a very light color, like a Titan Buff or white.  You will get lots of depth using one tool.  Then add a sentiment or embellishment, and voila!

Stencil used:  Herbs and Doors & Windows

3.  Tease out hidden elements.  Hold your page far away from you and squint.  Are any hidden shapes peeking through?  Bring them out.   Here, I saw a face peeking through the leaves and brought her to the front.  (For more on this technique, as well as my tips and tricks for painting faces, check out my online class - Facing Faces!)

Stencil Used:  Curvy Stems by Terri Stegmiller
4.  Push your page to the background by adding elements in complimentary colors.  See how the orange flowers seem to jump forward?  You can do this with paint, ink or collage.  (This page is a demo from one of my Floral Canvas Class.)


5.   Just keep going.  Keep adding layers.  Remind yourself that no effort you make in your artwork is ever wasted.  Something you initially dislike may hold the kernels of something you may eventually love.   That's what happened for me with this 2013 journal page.  


Here's a video of how it happened. 


You can also watch Rescuing a Journal Page on YouTube.
Here's what my worktable looked like as I experimented with all these techniques!


I leave you with these words from one of my favorite books - The Phantom Tollbooth, by Norton Juster:
“You may not see it now," said the Princess of Pure Reason, looking knowingly at Milo's puzzled face, "but whatever we learn has a purpose and whatever we do affects everything and everyone else, if even in the tiniest way. Why, when a housefly flaps his wings, a breeze goes round the world; when a speck of dust falls to the ground, the entire planet weighs a little more; and when you stamp your foot, the earth moves slightly off its course. Whenever you laugh, gladness spreads like the ripples in the pond; and whenever you're sad, no one anywhere can be really happy. And it's much the same thing with knowledge, for whenever you learn something new, the whole world becomes that much richer.”
Words to live by! 

         Visit Stencil Girl Products and RubberMoon Stamps to see all my designs!


If you haven't already - please connect with me here:
Your comments make me so happy and let me know you were here. I read and treasure every comment and will happily answer any questions as soon as I can.

If you are entering a GIVEAWAY, please add your email address in the event I need to contact you.

To avoid SPAM, please write it like this: jessicasporndesigns (at) gmail (dot) com

Thank You!

Tuesday, May 10, 2016

How to Doodle With Your Stamps and Stencils

Sometimes I want to add marks and shapes in my art journal, but I'm just too tired to think of them.  Maybe the muse isn't grabbing me.  How about using images in the stamps and stencils you already have to add visual interest when you're just not "feeling it."


The key?  Use parts of stencils, and stamp your images on tissue paper.  That's what I did inside the two birds in this art journal page.  


Not sure what I mean?  Here's a video tutorial showing you can use your supplies "Outside the Box."


Do you have stamps and stencils you could use this way?  I'd love to see examples if you use this technique! (use #jessicasporndesigns if you post it somewhere so we can find it)
Are you signed up for my newsletter?  The second Thursday of every month is Thankful Thursday, when I send a free download of my art just to my newsletter subscribers.  So if you would like it, make sure you sign up today!

Visit Stencil Girl Products and RubberMoon Stamps to see all my designs!


If you haven't already - please connect with me here:


Your comments make me so happy and let me know you were here. I read and treasure every comment and will happily answer any questions as soon as I can.


If you are entering a GIVEAWAY, please add your email address in the event I need to contact you.

To avoid SPAM, please write it like this: jessicasporndesigns (at) gmail (dot) com

Thank You!

Tuesday, April 19, 2016

Mucking Around in my Art Journal

Today, I'm introducing a feature called "Mucking Around in my Art Journal."


What does it mean to "Muck Around?"

In my case, it means playing in my art journal with no particular goal in mind.  I'm not trying to demo a particular stencil, stamp or technique.  I'm just puttering around and being led by the process.    Here's the art journal page:


And here's the process!


You can also watch "Mucking Around in Your Art Journal" on YouTube here.   

What do you think of this as the start of a new series?  Let me know in your comments!


         Visit Stencil Girl Products and RubberMoon Stamps to see all my designs!


If you haven't already - please connect with me here:
Your comments make me so happy and let me know you were here. I read and treasure every comment and will happily answer any questions as soon as I can.

If you are entering a GIVEAWAY, please add your email address in the event I need to contact you.

To avoid SPAM, please write it like this: jessicasporndesigns (at) gmail (dot) com

Thank You!