Showing posts with label stenciling. Show all posts

Thursday, June 29, 2017

Mixed Media Layers: Tissue & Deli Paper with Kristin Van Valkenburgh


“A grownup is a child with layers on.”
— Woody Harrelson

Hey there!
I hope this finds you happy and well. I had so much fun playing with layers this time around for the Jessica Sporn Creative Team, that my fingers are still stained with ink and sticky with glitter as I write this.

Like many of us, I love, love, love adding layer upon layer to my art journaling pages or canvas pieces. The barely visible bits and pieces here and there create mystery and not only draws me in, but hopefully those who come behind me as well.

One of my favorite ways to add sheer layers is with decorative tissue and deli papers. I discovered deli paper through an artist friend of mine who not only inspired me to try it, but also sent me some of her stash so I could! Deli paper is just that - paper used to wrap deli sandwiches. It has a lovely sheen, is matte on one side, and takes wet media like a star. Likewise, tissue paper (I know I’m not the only one who hoards it at birthday parties ;) comes in so many colors, and is so see through, that it too can be so fun to play with.

Follow along as I create this layered piece using Jessica's Women Will Heal the World Stencil and Build-A-Neighborhood Stamp.  Put your own personal spin on my project and share it with us on Pinterest.  Be sure to tag it with #JSD #CreativeTeam and #KristinVanValkenburgh so we see your creation!
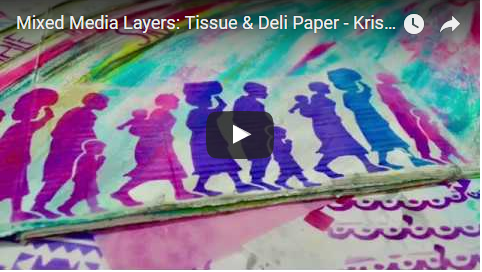
 Click to watch on YouTube


A childhood obsession with Hollywood starlets led to an early life in the theater, where Kristin Van Valkenburgh spent many happy days on set and behind the scenes as both an actress and makeup artist for the stage. Kristin has a passion for all things mixed media and loves to create whimsical pieces with lots of layers, bright, poppy colors, big eyes and positive affirmations. Her work has been featured in numerous Stampington publications including Somerset Studio, Somerset Studio Gallery, Somerset Life, Somerset Apprentice, Artists’ Cafe and Art Journaling.  


You can find Kristin on her blog, YouTube, Facebook and Instagram.

THANK YOU KRISTIN!
To see all of the Creative Team posts, click here!


         Visit Stencil Girl Products and RubberMoon Stamps to see all my designs!


If you haven't already - please connect with me here:
Your comments make me so happy and let me know you were here. I read and treasure every comment and will happily answer any questions as soon as I can.

If you are entering a GIVEAWAY, please add your email address in the event I need to contact you.

To avoid SPAM, please write it like this: jessicasporndesigns (at) gmail (dot) com

Thank You!

Thursday, May 4, 2017

Mixed Media Resist: Vaseline & Stencils - Creative Team Thursday with Kristin Van Valkenburgh


“We keep moving forward, opening new doors, and doing new things, because we're curious and curiosity keeps leading us down new path.” — Walt Disney

It’s my turn again! And I can’t wait to share with you an old-ish technique that I’ve been experimenting with lately.

Like many of us, I’ve been in love with Mixed Media for what seems like a lifetime and as a result, there aren’t any tips or techniques I haven’t tried. I love anything that creates texture or visual interest, and will literally swoon over something as simple as messy cracks or crevices on a project or page.

One of the first Mixed Media processes I learned that creates cracks and crevices is the “Peeling Paint” technique which uses Vaseline as a resist. Have you ever tried it? It’s quick, easy and uses what you already have in your medicine cabinet.

But. . . . I’d never experimented with pushing it through anything - not to mention a stencil - before now. To be honest, I wasn't even sure it would work! But work it did, and I must say, the results are pretty cool.

Check it out for yourself, and let me know what you think! The whole process can be found below. And stay tuned to the end to see a (really fast) tag I made using the technique.


Your turn!

Have fun and stay sloppy,
Kristin xo!

Stencil Used: “Borders 9J Stencil” by Jessica Sporn for Stencil Girl
http://www.stencilgirlproducts.com/product-p/l089.htm


A childhood obsession with Hollywood starlets led to an early life in the theater, where Kristin Van Valkenburgh spent many happy days on set and behind the scenes as both an actress and makeup artist for the stage. Kristin has a passion for all things mixed media and loves to create whimsical pieces with lots of layers, bright, poppy colors, big eyes and positive affirmations. Her work has been featured in numerous Stampington publications including Somerset Studio, SomersetStudio Gallery, Somerset Life, Somerset Apprentice, Artists’ Cafe and Art Journaling.  


You can find Kristin on her blog, YouTube, Facebook and Instagram.

THANK YOU KRISTIN!
To see all of the Creative Team posts, click here!


         Visit Stencil Girl Products and RubberMoon Stamps to see all my designs!


If you haven't already - please connect with me here:
Your comments make me so happy and let me know you were here. I read and treasure every comment and will happily answer any questions as soon as I can.

If you are entering a GIVEAWAY, please add your email address in the event I need to contact you.

To avoid SPAM, please write it like this: jessicasporndesigns (at) gmail (dot) com

Thank You!

Tuesday, April 25, 2017

DIY - Painting on Porcelain


I've experimented with decorating white porcelain plates with sharpies before.


But my experiments were always in black and white.  I decided to do another experiment with color.

Here's a super short time-lapse video of how it all started ...


Steps:  Make sure to wash your plates first, to make sure there is no residue.   I find it's easier to cut up my stencils (GASP!) to make it easier to lay the motifs on the plates.   (Note that the 4 x 4" stencils from Stencil Club are perfect - no cutting needed!  The orange/yellow middle swirl flower was designed by Maria McGuire for March 2017.    All of the other elements are from my designs for November 2016.  (If you don't know about Stencil Girl's Stencil Club - check it out here.))


I sketched in the motifs (plus some doodles), using regular Sharpie markers.  (The recommendation you'll find on the internet is to use oil paint markers.  But I used regular Sharpies and the result was good.  It was good to have both the fine and extra fine tips depending on the size of the opening of the stencil.)

Once I had all the designs drawn in, I baked them in a 350 degree oven for 30 minutes.  (you can find varying instructions on Pinterest.  Some say 150 degrees, others 450.  I went in the middle, which turned out to be fine.)  I've washed these with soap and water and a scrubby sponge - and they're holding up just fine.  (I haven't put them in the dishwasher.)


Quick and easy, one-of-a-kind gifts for summer entertaining!

Your comments make me so happy and let me know you were here. I read and treasure every comment and will happily answer any questions as soon as I can.

Thank You!


         Visit Stencil Girl Products and RubberMoon Stamps to see all my designs!


If you haven't already - please connect with me here:

Tuesday, April 26, 2016

Creating Prayer Flags, Bags and Bookcovers

On a cold Saturday, five creatives came over and we stenciled our own fabrics and made amazing creations.   Here's a re-cap - with lots and lots of eye candy!


This class was inspired by a workshop I took at Art is You in 2014, taught by Kecia Deveney and Linda Willis and called Flags of Affirmation.  You can read more about my experience in Flags of Affirmation here.  Kecia and Linda gave me permission to pass on their techniques and add my own spin.

We started off stenciling white and solid color fabrics with all sorts of beautiful colors from Deco Arts Fabric Paints.  


Here is Isolina Perez's gorgeous work - how many Stencil Girl Stencils can you spot?  Isolina is a jeweler and will be teaching at Art is You this fall.  I am always so honored when other teacher's take my classes.


Sandy Grezzi used gorgeous colors to create front and back journal covers.  Sandy is a former VP with the Craft and Hobby Association turned full-time marketing consultant.  I'm happy to give her opportunities to get her hands painty. 


Tery Favo concentrated on sea colored fabrics for a purse she's making.  She's a former doll maker and jeweler.  She brings the best snacks and always has the best creative ideas.  


Jodi Oster created a beautiful cover for her art journal.  You can see more of Jodi's beautiful folk art on Etsy


 Here I am sewing up Isolina's beautiful prayer flag banner.  My daughter Samy peeked in.


 Here's how Isolina's banner looked all stitched up.  So beautiful!


Brigitte ended up with a beautiful bag, and lots of stenciled fabric to play with at home.

and I finally finished sewing a mat for hot platters.  I've been working on it forever!  We had a wonderful time together!


The deadline to apply to my Design Team is May 1!  I hope you'll check out the requirements and apply.  

Visit Stencil Girl Products and RubberMoon Stamps to see all my designs!


If you haven't already - please connect with me here:
Your comments make me so happy and let me know you were here. I read and treasure every comment and will happily answer any questions as soon as I can.

If you are entering a GIVEAWAY, please add your email address in the event I need to contact you.

To avoid SPAM, please write it like this: jessicasporndesigns (at) gmail (dot) com

Thank You!