Showing posts with label stamping. Show all posts

Thursday, June 29, 2017

Mixed Media Layers: Tissue & Deli Paper with Kristin Van Valkenburgh


“A grownup is a child with layers on.”
— Woody Harrelson

Hey there!
I hope this finds you happy and well. I had so much fun playing with layers this time around for the Jessica Sporn Creative Team, that my fingers are still stained with ink and sticky with glitter as I write this.

Like many of us, I love, love, love adding layer upon layer to my art journaling pages or canvas pieces. The barely visible bits and pieces here and there create mystery and not only draws me in, but hopefully those who come behind me as well.

One of my favorite ways to add sheer layers is with decorative tissue and deli papers. I discovered deli paper through an artist friend of mine who not only inspired me to try it, but also sent me some of her stash so I could! Deli paper is just that - paper used to wrap deli sandwiches. It has a lovely sheen, is matte on one side, and takes wet media like a star. Likewise, tissue paper (I know I’m not the only one who hoards it at birthday parties ;) comes in so many colors, and is so see through, that it too can be so fun to play with.

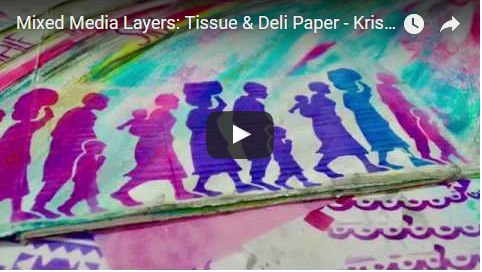
Follow along as I create this layered piece using Jessica's Women Will Heal the World Stencil and Build-A-Neighborhood Stamp.  Put your own personal spin on my project and share it with us on Pinterest.  Be sure to tag it with #JSD #CreativeTeam and #KristinVanValkenburgh so we see your creation!

 Click to watch on YouTube


A childhood obsession with Hollywood starlets led to an early life in the theater, where Kristin Van Valkenburgh spent many happy days on set and behind the scenes as both an actress and makeup artist for the stage. Kristin has a passion for all things mixed media and loves to create whimsical pieces with lots of layers, bright, poppy colors, big eyes and positive affirmations. Her work has been featured in numerous Stampington publications including Somerset Studio, Somerset Studio Gallery, Somerset Life, Somerset Apprentice, Artists’ Cafe and Art Journaling.  


You can find Kristin on her blogYouTube, Facebook and Instagram.

THANK YOU KRISTIN!
To see all of the Creative Team posts, click here!


         Visit Stencil Girl Products and RubberMoon Stamps to see all my designs!


If you haven't already - please connect with me here:
Your comments make me so happy and let me know you were here. I read and treasure every comment and will happily answer any questions as soon as I can.

If you are entering a GIVEAWAY, please add your email address in the event I need to contact you.

To avoid SPAM, please write it like this: jessicasporndesigns (at) gmail (dot) com

Thank You!

Tuesday, May 10, 2016

How to Doodle With Your Stamps and Stencils

Sometimes I want to add marks and shapes in my art journal, but I'm just too tired to think of them.  Maybe the muse isn't grabbing me.  How about using images in the stamps and stencils you already have to add visual interest when you're just not "feeling it."


The key?  Use parts of stencils, and stamp your images on tissue paper.  That's what I did inside the two birds in this art journal page.  


Not sure what I mean?  Here's a video tutorial showing you can use your supplies "Outside the Box."


Do you have stamps and stencils you could use this way?  I'd love to see examples if you use this technique! (use #jessicasporndesigns if you post it somewhere so we can find it)
Are you signed up for my newsletter?  The second Thursday of every month is Thankful Thursday, when I send a free download of my art just to my newsletter subscribers.  So if you would like it, make sure you sign up today!

Visit Stencil Girl Products and RubberMoon Stamps to see all my designs!


If you haven't already - please connect with me here:


Your comments make me so happy and let me know you were here. I read and treasure every comment and will happily answer any questions as soon as I can.


If you are entering a GIVEAWAY, please add your email address in the event I need to contact you.

To avoid SPAM, please write it like this: jessicasporndesigns (at) gmail (dot) com

Thank You!

Thursday, January 22, 2015

Pocket Heart Valentines with Stencil Girl Stencils


I am determined to be ahead of the game this Valentine's Day.  So... I've been studiously making Valentines.  This post is inspired by a terrific project by The Frugal Crafter.   Lindsay made cute little Valentine pockets to hold lollipops.


I immediately wanted to try this project.  Of course, I had to put an artsy, mixed media spin on them.  Here's how I made mine:

Using the "Hearts Flowers & More" stencil, I created this page using color copy paper.  (Mary Beth Shaw turned me on to this paper and I really like the weight of it.)  I have to say that I LOVE this stencil, and the Alice in Wonderland feel it has.


Using Golden Fluid Acrylic paint in Quinacridone Red and Glazing Medium, I reduced the contrast on the page, while keeping the design peeking through.


While this was drying, I carved a heart stamp, using my Speedball carving tool and carving block, and stamped up an entire page.  (To learn how to carve your own stamps, check out Julie Balzer's great online class.)


Next, I took plain 3 x 6 manilla tags and folded them almost in 1/2 to make pockets.


Using different shades of distress inks and a blending tool, and the Hearts, Flowers and More stencil, I inked up the fronts and backs of the pockets, and the sides.


I punched hearts out of my stenciled and glazed paper, and then cut out my stamped hearts.  I also stamped some other sentiments, and used a mini-tag punch to cut them out.  I layered them onto the punched hearts, and adhered everything with my UHU glue stick.


I thought about sewing up the sides, but instead sealed the sides with wash tape from my stash, and punched a hole in the bottom of each one with my Crop-a-Dile .   Now, all I need are the lollipops!

Your comments make me so happy and let me know you were here. I read and treasure every comment and will happily answer any questions as soon as I can.

If you don't already, please sign-up for my newsletter HERE, and follow me on Facebook, PinterestBloglovin and YouTube, so that you never miss a giveaway, and always get the latest Jessica Sporn Designs News!  


 Follow on Bloglovin

Sunday, January 18, 2015

Another Envelope Book and a Video


Do you remember the envelope book I made for my parents for Christmas?  It was featured on StencilGirl Talk.  Here's another one, using a different color palette and featuring some different stencils.  I started out using the Hearts, Flowers and More stencil with gesso on the inside of the book, and some of Pam Carriker's paints on the outside.

Here's a video showing how I used the gesso as a resist, and also how I assembled the book.  You can also watch "Creating Resists with Gesso and Paint" on Youtube.


Here are peeks at the inside pages and links to some of the other stencils and stamps I used.  This is a great way to use up old envelopes and reduce your stash!

Each of the envelopes has it's own tag, that peeks out of the pocket.  


This is the terrific pattern from Maria McGuire's Doodle-It Inchie Stencil, with one of Tim Holtz's chit chat words.  These are great stickers to have on hand, as there's a word for every sentiment and occasion!

Here's more of the "Doodle it Inchie" pattern.  Plus, I used Mary Nasser's Compass Stencil, and Pam Carriker's Borders stencil on these page.   


I love this Mary Oliver quote on a Technique Junkies' stamp.  I always stamp on tissue paper first, and then adhere to my tag or background.  I get a much better impression that way...


This awesome hand stencil is by Lizzie Mayne:


and I love this stamp from Tim Holtz.


The cover of the book features one of the hands from the Namaste stencil. 

I hope this post tickled your creativity bone.

Your comments make me so happy and let me know you were here. I read and treasure every comment and will happily answer any questions as soon as I can.

If you don't already, please sign-up for my newsletter HERE, and follow me on Facebook, PinterestBloglovin and YouTube, so that you never miss a giveaway, and always get the latest Jessica Sporn Designs News!  


 Follow on Bloglovin

Thursday, June 27, 2013

Grounding Down to Extend Up


Remember the bits and pieces that I made using the Dots and Dashes stencil and my Gelli Plate in this post?


I used the leaves, flowers and circles in my art journal, to embellish a tree stamped on tissue paper using a Donna Downey stamp; you can watch the process in this video.


This page came about when I found the word "grow" as I was cleaning up my studio today.  I had written, but not used, the word for a prior project.  (Sometimes it IS good to clean!)

In yoga, we always say that step one is to get grounded.  Spread your roots, whether they be your feet in a standing pose, your hands and feet in downward dog, or your hands in handstand!


You can't extend up and grow if you're not connected to the earth beneath you.  Think about the most majestic, stately tree.  If its roots aren't firmly in the earth below, it will topple.


I know my yoga practice is so important to keeping me grounded.  As is our service work in Guatemala.

What keeps you grounded?

Thank you for visiting! I hope you will leave me a comment to let me know you were here.   I read and treasure every comment and will answer any questions as quickly as I can.

And the winner of the giveaway from the Jump for Joy Stencil test drive is

texasbarb who wrote:  Love the projects!! Thank you so much for making the videos!! I'm a visual learner and it really helps me to see how a project comes together. LOVE the jump for joy stencils...such happy, happy girlies...I need that in my life!!  Congratulations and I hope you enjoy the stencil!


Linking to Paint Party Friday, a Colorful Gelli Print Party (coming July 1) and Art Journal Everyday!

Monday, October 22, 2012

Don't Just Dream It, Do It!

"Just by putting one foot in front of the other, you can climb any mountain."  Manorama  
 I got so many comments on "Embrace the Rain."  Thank you to everyone who left a kind word.  So more on this theme.  

First, I used stamped white gesso into this great gears stencil from StencilGirl:

Then I washed periwinkle, blue and white acrylic paint into it, sprayed it with water, and rolled a paper towel over it to lift off a lot of the paint.  You can see how the gesso did not grab the paint as well as the watercolor paper, and this created a cool texture.
I glued down some torn dictionary page scraps, and finger painted them with green and gold fluid acrylics:

I traced Balzer Designs' Blazonry stencil to create tops of trees: (I've also used this stencil to make surfboards!)
 Glued them down using some Glitz paper strips for tree trunks!
 Carved a cute chickie stamp, wrote out my text on card stock and cut it out, stamped and doodled, and voila:
Hope you like this plucky chick -- walking bravely to "Yes I Can, Yes I Will!"

Here's Samy talking to one of the ghouls in our front yard!  (Our house is really blue...)  Trying to get into the Halloween Spirit around here.
Thank you for visiting! If you are so moved, please leave a comment. Hearing from you means the world to me.
Linking up to Mandarin Orange Monday (in honor of my orange chicky), Art Journal Cafe (handcarved stamp)Inspire Me Monday, and Creative Everyday.