Summer is in full swing in The Netherlands and since I live near the North Sea, I thought it would be nice to make a tote bag to take my things (towel, drinks, book) with me to the beach.***
I had some left over pieces of fabric laying around so I sewed my own tote bag but if you are not a seamstress you can easily find/buy a plain, off-white tote to decorate and make your own.
This won't be a 'how to sew a bag' tutorial but if you are handy with a sewing machine and like to sew a tote bag yourself, here's the sizes of my tote.
I cut two pieces of canvas for the front and bag and strips of left over white fabric (I don't know exactly what kind of textile it is, it looks like curtain fabric and has a bit of texture in it.)
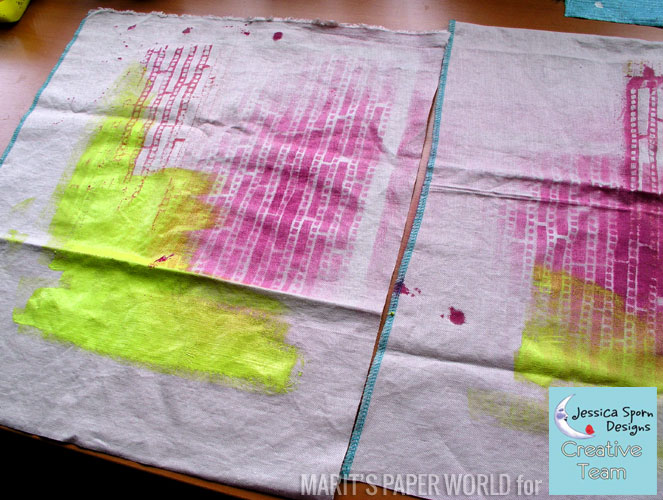
I put the strips aside and start to decorate the back and front of my tote. If you work on an existing tote back, be sure to put a piece of plastic in the tote before decorating it to prevent the other side from bleeding spots. I want the decoration to be fun and whimsical so I use 5 different stencils.
I have one bottle of pink fabric spray paint that I use to spray over the Dots & Dashes stencil. I then take my acrylic paints and use brushes, a brayer and my hands to smear, stencil, plug, rub and paint.
I choose bright colors and keep on adding paint...
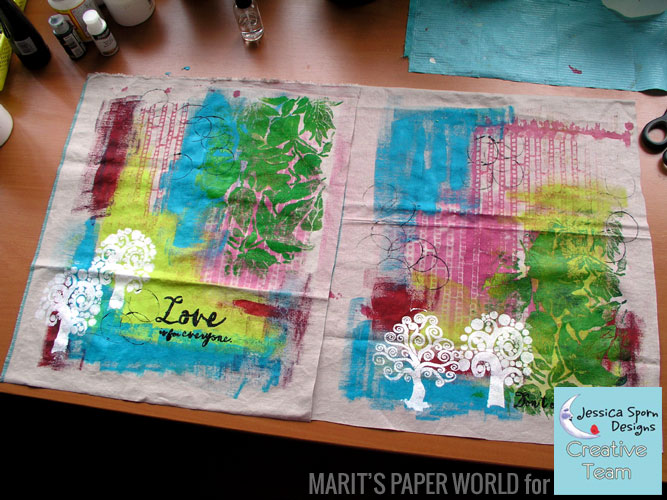
Once the background is to my liking, it's time to get out the stencils that have more of a figurative design: Judy's Trees, Fallen Leaves and Love is for Everyone Script. I also stamp some circles with a toilet roll, just because I love circles.
I find the look still a bit boring, so I take out my favorite stencil Circles & Squares and add some extra white. I outline the images with a black Poster-paint Sharpie for more contrast 'et voila!'
Here's a detail photo.
On to the strip then... I cut a few strips earlier and I now sew those together to get one, really long strip that will fit around the bag. To match the design on the front and back I decide to use the Dots & Dashes stencil again with black paint.
My plan was, to make an astringent black and white print and add a lot of black but once I start to apply the paint through the stencil (I use a brayer for that) I notice that the texture in the fabric adds for extra interest - those are the happy accidents that make creating fun - so I go easy with the black paint.
Once the fabric is dry, I sew the parts together. I have a bit of 'strip' fabric left over that I sew at the top of the tote. I also use some of the black & white fabric to create the handles.
And now that we come to the end of the tutorial, you want to see the finished tote bag don't you? And maybe you also wondered what the *** (asterisks) meant at the beginning of this post... well, when my tote was done I showed it to my beloved and he just LOVES it!!! In our household he is the one that walks to the store to do the grocery shopping for our dinner almost daily and this tote would be perfect for that. So my beach tote gets another use... as of now you can see my beloved walking around with this tote.
SUPPLIES USED:
Stencils:
•
Dots & Dashes
•
Judy's Trees
•
Circles & Squares
•
Fallen Leaves (new)
•
Love is for Everyone Script (new)
Other:
•
Pink textile spray ink
•
Acrylic paints
•
Black poster-paint Sharpie
 Marit Barentsen is a passionate art journaler, mixed media artist, art instructor and creative writer from the Netherlands. Marit inherited a passion for words from her mother, who is a writer. Her father taught her to not only “look “ but also “see.” That combination led Marit to become an art teacher and her art always showed images and words. After art school, she worked as a graphic designer. Years later, she re-discovered the combination of words and images in art journaling and her art took flight. Marit's art has been published in various magazines and art books.
_______________________________________________________________________________
THANK YOU MARIT for an awesome post!
If you haven't already - please connect with me here:
Your comments make me so happy and let me know you were here. I read and treasure every comment and will happily answer any questions as soon as I can.
If you are entering a GIVEAWAY, please add your email address in the event I need to contact you.
To avoid SPAM, please write it like this: jessicasporndesigns (at) gmail (dot) com
Thank You!