Hi there sweeties...
it's Marit here with another fun tutorial for you! It's my last blogpost as a
member of the Design Team, but I get to that at the end of this post. First I
am going to show you how you can use even your big stencils on a tiny little
piece of paper, like an ATC. (Artist Trading Cards [ATCs] is a conceptual
art project initiated by the Swiss artist M. Vänçi Stirnemann in 1997. Artist
Trading Cards are 2.5 by 3.5 inches in size. They are self-made unique works or
small series, signed and dated on the reverse by the artist/producer, exchanged
and collected by the people who participate in collaborative performances ~
Wikipedia)
This tutorial will be
a little bit different than usual 'cause I will also show you my tests and my
failures. I know some of you out there would love to start art journaling or
painting or 'something' creative, but get discouraged seeing all the 'good
stuff' made by well known artists. Well, let me tell you something: these
artists make mistakes too, they just don't show their attempt and failures on
their websites. I usually don't show those either... my blog posts would get
rather long and it's always nicer to show the finished results. But hey, I do
spend a lot of time on testing and trying without (satisfying) results. And I
also get frustrated sometimes when it comes to creating art. I try and fail.
And once in a while I try and succeed.
So today I'm going to
show you my process of creating ATCs, including the tests and attempts that I
put aside as 'not to my satisfaction'. Ready?

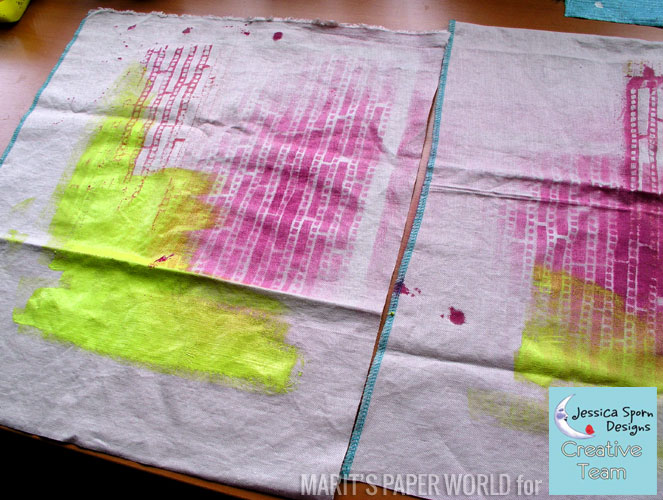
First, I take out some
gelli-printed background papers that I have in stock. When I gelli-print, I
always make some background papers to use later. These are rather simple
prints, just some different colored paint rolled onto the gelli-plate and
printed on thick watercolor paper.
Next, I combine
stencils with prints - I choose stencils
that match (in my opinion) with the colors on the backgrounds.

I want to add some
dimension so I use modeling paste to scrape through the parts of the stencils
that I like to use.

See how I use just
parts of the stencils? These parts of my paper will turn into ATCs (2.5 x 3.5
inch) so I don't need the full image design. Also, I might want to use part of
the background paper as is to glue on the back of my ATCs so I leave some spots
untouched.
Let the modeling paste
dry completely overnight. The modeling paste adds some dimension and gives
depth to the image, here's a detail.


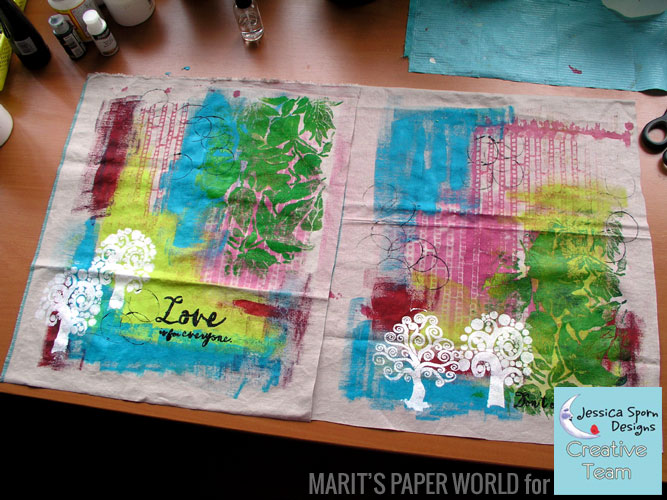
Now, I don't know
exactly how to go on... shall I paint the images? What would it look like if I ink them? I try several different techniques to see what each looks like so I can pick the ones I like best.
On one page, I paint
the stenciled images with yellow acrylic paint. I kinda like it, but the yellow
against the background doesn't show much contrast.
On another image I add
distress ink with a Q-tip. Hmmm... too fuzzy looking. Antiquing creme then... I
put it on the stenciled image and take it off again right away... it looks
awful!
I then grab my golden acrylic paint... I love how it bubbles when you
dry the paint with a heat tool - I used that technique quite a lot in the past
and I use it now on the stenciled image. Wowzah, that's it!

I love the images that
I painted yellow the best for my ATC-series but I want them in gold, so I paint
over the yellow and I put the other attempts aside. (No, I don't throw them
away! Parts of it might end up in an art journal or can be used as postcards.)

Drying the wet paint
with my heat tool makes the paint bubble... doesn't it look magical? (btw,
this technique works with most acrylics and even gesso.)

And now here's a
trick: I cut a frame in the size of an ATC (2.5 x 3.5 inch.) Using a frame like
this really is a simple but effective way to 'find' you ATC on a background (or
find a nice detail in a photo from a magazine for example.) I find three ATC
cards on the one piece of paper background.


I flip through my magazines and find some
fitting words in an advertisement. The colors (black on yellow) add some
contrast to my cards.
I'm not satisfied
still, so I get out my sewing machine and sew around the words. Yep, that's it!

Here's the back of my
ATCs. To cover the stitches and the smears I cut out three pieces from the left
over paper and glue them on the back.

ATCs are always signed
and dated on the back. You can of course use a marker and write the info or
type, print and cut out strips with your info that you glue on the back. I
myself bought an 'ATC stamp' years ago and use it ever since. There are all
kinds of ATC stamps for sale and if you make ATCs often, it might be worth
buying (or making) one. I just love the different ways I can use it. In this
case, I stamp it on a pink-ish piece of paper that I cut out and glue on the
back.

I'm not done yet...
the white edges of the ATCs show that the card is made of two pieces glued
together. You know how that looks like, don't you? To give the ATCs a finished
look, I smear some black paint (DecoArt fluid acrylics, Carbon black) around
the edges, using my finger.

And now my little ATC
series is all done... here's the front ánd the back.

And with this tutorial
my term as a member of the Jessica Sporn Design Team comes to an end. When I
applied for the DT - in April 2016 - it
was with ulterior motives. Not only did I admire Jessica's art and did it seem
awesome to be able to work with her designed stencils and stamps, I also could
do with a bit of consistency... with illness in the family and looking at
surgical procedures coming up (my mum, my beloved) I faced an insecure year and
had no idea what the months ahead would bring. I thought it would help me 'come
through' when I would be a member of Jessica's Design Team so that I could keep
on making art on a regular base without laying too much pressure on myself. I
am ever so grateful that Jessica accepted my submission and brought me into her
Design Team. Thank you so much dear, it was exactly what I needed! Now, a year
later, everyone is healthy and happy again and it's time for me to move on and
dive deeper into my own art again. It was a pleasure to create these tutorials
for you!
SUPPLIES USED:
Stencils:
Other:
·
Leftover
gelli print backgrounds
·
DecoArt
Modeling paste
·
Panduro
Acrylic heavy body studio paint (Gold)
·
DecoArt
fluid acrylics (Carbon Black)
·
Cut out
text from magazine
·
Sewing
machine w. black thread
·
Stazon ink
(Jet black) + ATC stamp
 Marit Barentsen is a passionate art journaler, mixed media artist, art instructor and creative writer from the Netherlands. Marit inherited a passion for words from her mother, who is a writer. Her father taught her to not only “look “ but also “see.” That combination led Marit to become an art teacher and her art always showed images and words. After art school, she worked as a graphic designer. Years later, she re-discovered the combination of words and images in art journaling and her art took flight. Marit's art has been published in various magazines and art books.
Find Marit on her website, Facebook page, and blog.
_______________________________________________________________________________
THANK YOU MARIT for an awesome post!
THANK YOU MARIT for an awesome post!


Visit Stencil Girl Products and RubberMoon Stamps to see all my designs!
If you haven't already - please connect with me here:
      |
Your comments make me so happy and let me know you were here. I read and treasure every comment and will happily answer any questions as soon as I can.
If you are entering a GIVEAWAY, please add your email address in the event I need to contact you.
To avoid SPAM, please write it like this: jessicasporndesigns (at) gmail (dot) com
Thank You!