Showing posts with label gelli print. Show all posts

Thursday, April 13, 2017

Origami Box with Gelli Prints - Creative Team Thursday with Marit Barentsen


Whenever I play with my gelli plate I come out with a whole stack of 'backgrounds.'  I use one or two of those prints for a project that started the 'gelli session' in the first place, but I keep all the leftover paper in a file. The stack grows and grows...
  
My mum once taught me how to fold a paper box with a lid (origami) and so I came up with this little project to fold a box from the leftover backgrounds and film the process to teach you how to do it.


It's a quick and easy way to make good use of old backgrounds (or any other paper for that matter) and a hand fold paper box makes a lovely and personal wrapping to put a small present in, to give to someone on a birthday.


With Easter coming up, you can also fold some boxes and fill them with chocolate eggs or other candy. You can make a whole bunch of boxes, from very small ones (to put one piece of chocolate in) to bigger ones... don't you think that will look good on a decorated Easter table?!

So here's a video on how to fold an origami paper box with a lid, have fun!


The used gelli prints were made with these stencils:
·         Circles& Squares
·         Dots &Dashes

Happy Easter!

Marit


Marit Barentsen is a passionate art journaler, mixed media artist, art instructor and creative writer from the Netherlands. Marit inherited a passion for words from her mother, who is a writer. Her father taught her to not only “look “ but also “see.”  That combination led Marit to become an art teacher and her art always showed images and words. After art school, she worked as a graphic designer. Years later, she re-discovered the  combination of words and images in art journaling and her art took flight.  Marit's art has been published in various magazines and art books. 


Find Marit on her websiteFacebook page, and  blog.

________________________________________________________________________________


THANK YOU MARIT for an awesome post! 


         Visit Stencil Girl Products and RubberMoon Stamps to see all my designs!


If you haven't already - please connect with me here:
Your comments make me so happy and let me know you were here. I read and treasure every comment and will happily answer any questions as soon as I can.

If you are entering a GIVEAWAY, please add your email address in the event I need to contact you.

To avoid SPAM, please write it like this: jessicasporndesigns (at) gmail (dot) com

Thank You!

Thursday, November 17, 2016

How to: Mini Journal - Creative Team Thursday with Lizzy Wurmann


Hi everyone! Lizzy with you again with another project for Jessica Sporn Designs.

Today I will show you on a video how I did a "mini journal" out of a catalog and watercolor paper.

For the cover I also used a catalog scoring 1/2" on its spine to insert the journal. I like the dimensions, each page is like a large tag.

For the cover I used Jessica's Medallions Stencil over a Gelli print.


You can see how I created this mini journal step-by-step on YouTube by clicking here.


Collage Sheets are by Mary Jane Chadbourne and Nancy Baumiller

On this page I used Layered Peonies Stencil

On this side  I used Squares and Circles Stencil


Until next time!

Lizzy Wurmann is a mixed media and scrapbook artist living in Santiago, Chile.  She uses a colorful and vibrant palette to create whimsical, unique, and often altered art.   Her quirky and abstract style has been featured in Somerset Studios, Somerset Memories and Somerset Digital Studios.  Lizzy is a veteran of many design teams, including Scraps of Darkness, Doris Castle, and Lindy’s Stamp Gang.  Find Lizzy on her blog, FacebookInstagram and very active YouTube Channel.


_______________________________________________________________________________


THANK YOU LIZZY for an awesome post! I love your inspired tutorial!


         Visit Stencil Girl Products and RubberMoon Stamps to see all my designs!


If you haven't already - please connect with me here:
Your comments make me so happy and let me know you were here. I read and treasure every comment and will happily answer any questions as soon as I can.

If you are entering a GIVEAWAY, please add your email address in the event I need to contact you.

To avoid SPAM, please write it like this: jessicasporndesigns (at) gmail (dot) com

Thank You!

Tuesday, October 25, 2016

DIY Spooky Halloween Centerpiece


Hi all -- I'm still channeling Halloween.

Recently, Sherry Canino did an awesome post for the Creative Team.  She upcycled a bottle and made it into a beautiful centerpiece.
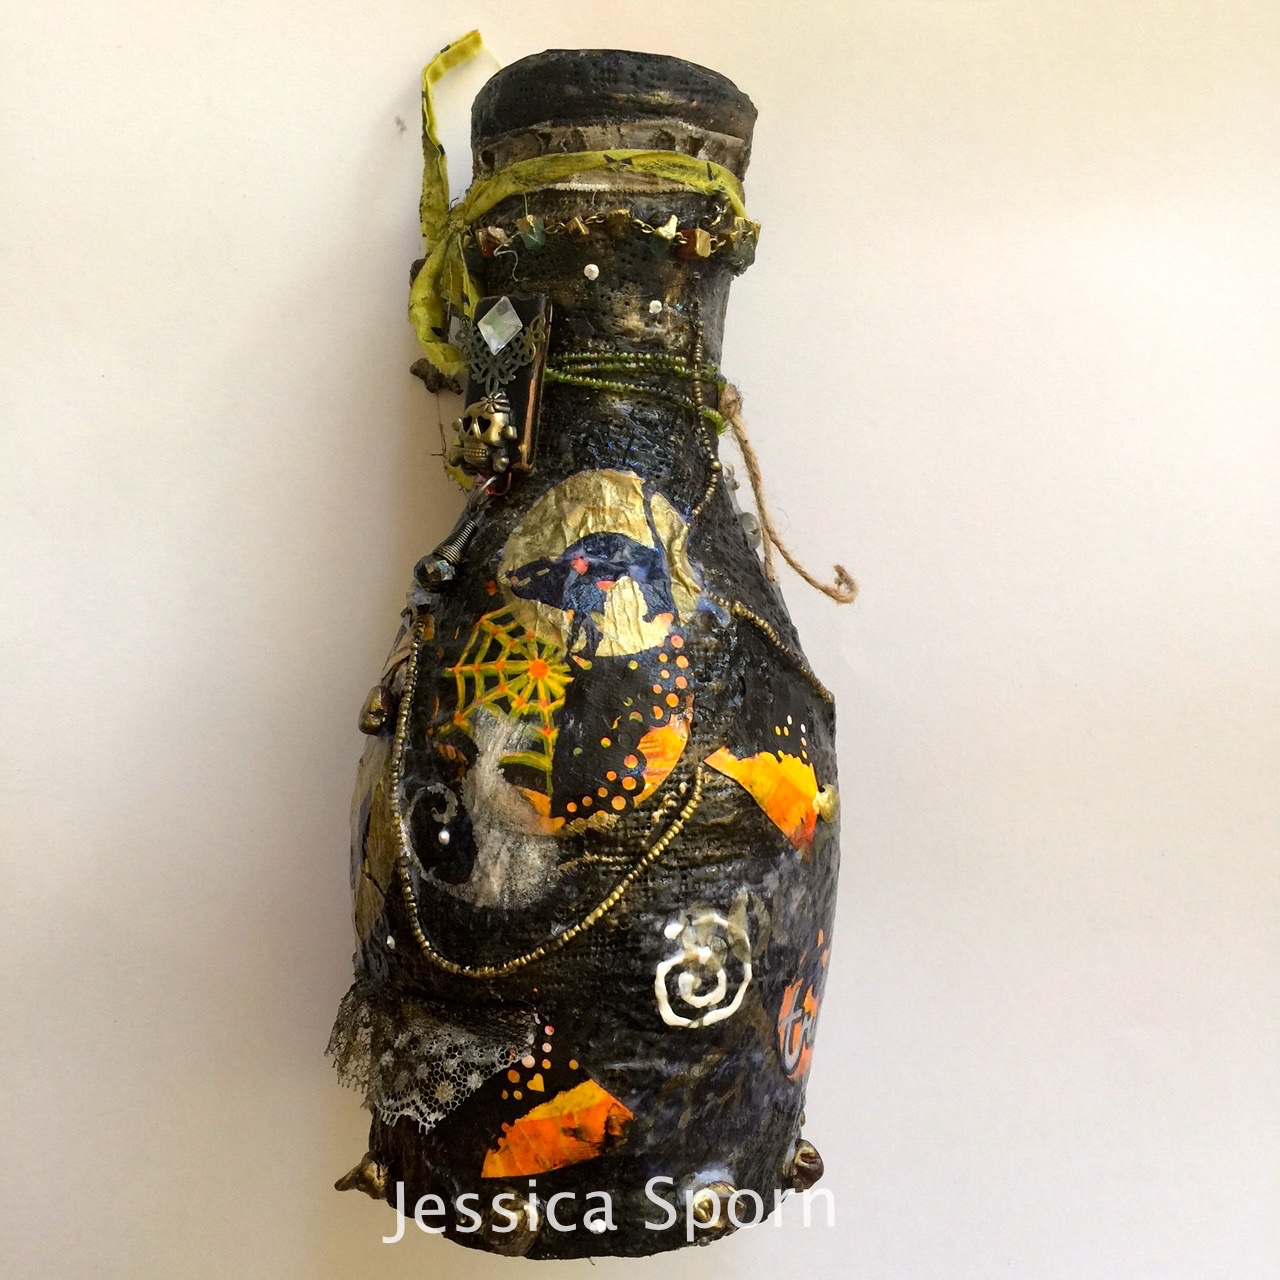
Her post inspired this Halloween potions bottle.


This is a soy milk bottle, which I rinsed thoroughly and then decoupaged using paper towels.  This gave it a rough texture.

After it was thoroughly dry,  I painted it with black gesso.  Then I went to town, gluing random bits and pieces that I had in my stash, and also some of the embellishments I created using the stencil and an orange gelli print.

(TIP:  the gelli printed paper was stiff and was difficult to adhere onto the bottle.  So I used a handy trick I learned from Nathalie Kalbach, and sprayed it with water.  This breaks down the paper a bit, and makes it more pliable!)

After embellishing the heck out of my bottle, I decided I wanted some gold accents of the stencil motifs.  But how to position the stencil around the chains, baubles, and other items I'd glued on?

I went to one of my favorite tricks - stenciling onto tissue paper, and then adhering the stenciled paper with matte medium.  When you adhere the tissue paper, the white parts seem to melt away, and it looks like you stenciled directly onto your substrate!


Here's a quick video to show you how.


You can also watch DIY Halloween Centerpiece on YouTube.  

I hope you've enjoyed these Halloween posts.  In case you missed them, check out Halloween Tags


Kristin Van Valkenburgh's spooky journal page,


Have a wonderful Halloween!!


         Visit Stencil Girl Products and RubberMoon Stamps to see all my designs!


If you haven't already - please connect with me here:
Your comments make me so happy and let me know you were here. I read and treasure every comment and will happily answer any questions as soon as I can.

To avoid SPAM, please write it like this: jessicasporndesigns (at) gmail (dot) com

Thank You!

Thursday, October 13, 2016

How To Use a Gelli Plate to Create an Art Journal Spread - Creative Team Thursday with Marit Barentsen


Goodmorning y'all, Marit here for Jessica Sporn Designs Creative Team. It's my turn to show you a project using Jessica's stencils & stamps and wowzah, aren't they fabulous?!


If you know me and my art, you probably know I am first and foremost an art journaler. I bind my own journals and I generally have six or seven different journals going, in which I alternately create. Sometimes I neglect one (or more) journals for some time, so it can take years to finish a journal. However, there is one art journal that appears on my desk weekly: the "Chronicles." This art journal serves as a diary, and I create a spread in it every week.

I started my 'Chronicles' in 2010 and over the years, many asked me to show how I build up the pages. Well... today is your lucky day 'cause I finally set up a video camera above my desk and filmed the whole process. I started with creating monoprints on a gelli plate, using Jessica Sporn's stencils and a stamp, and I used those monoprints as a background on which I created my weekly spread. Enjoy!


You can also watch Gelli Printed Art Journal Spread on YouTube.

Here's the finished spread. 
The stencils I used are:

Squares & Circles
Runes
Judy's Trees

The Stamp I used is: 

(Build a Villa) Fonion Dome

***


P.S. Did you see Jessica Sporn Designs' brand NEW Halloween stencil?! It is perfect for your spooktacular, Halloween card making, home and party decor, as well as your art journal and mixed media projects! 

Have fun creating.
Love from the Netherlands,
Marit


Marit Barentsen is a passionate art journaler, mixed media artist, art instructor and creative writer from the Netherlands. Marit inherited a passion for words from her mother, who is a writer. Her father taught her to not only “look “ but also “see.”  That combination led Marit to become an art teacher and her art always showed images and words. After art school, she worked as a graphic designer. Years later, she re-discovered the  combination of words and images in art journaling and her art took flight.  Marit's art has been published in various magazines and art books. Find Marit on her websiteFacebook page, and  blog.
________________________________________________________________________________

THANK YOU MARIT for an awesome post! 


Visit Stencil Girl Products and RubberMoon Stamps to see all my designs!

If you haven't already - please connect with me here:
Your comments make me so happy and let me know you were here. I read and treasure every comment and will happily answer any questions as soon as I can.

Thank You!