Showing posts with label corrine gilman. Show all posts

Tuesday, May 3, 2016

Stencil Test Drive Redux #7

Welcome to the 7th Stencil Test Drive Redux!  (See all the test drives here.

GIVEAWAY ALERT!  Each month, I will give away one of the featured stencils to one lucky subscriber.  All you need to do is post a comment below. Comments for the giveaway will close on Monday at 9PM EST, and the winner will be posted in this post by Tuesday morning at 9AM EST, so make sure to check back!  

This week - a look back at the Random Squares Stencil Test Drive. Here's peek at my shrine project from that Test Drive and the Random Squares Stencil itself. 


And here are the amazing projects from the artists on that original test drive. Click the names below the images to go to the original blog posts.  The tutorials are fantastic.


I hope you'll check out all of these posts and the great tutorials they have!  Thank you again to all the artists who participated!

GIVEAWAY ALERT: For a chance to win the Random Squares Stencil, make sure to leave a comment below and include your email address.   
And the winner is....
If you've used one of my stencils, make sure to send me a picture/link and let me know! 


         Visit Stencil Girl Products and RubberMoon Stamps to see all my designs!


If you haven't already - please connect with me here:
Your comments make me so happy and let me know you were here. I read and treasure every comment and will happily answer any questions as soon as I can.

If you are entering a GIVEAWAY, please add your email address in the event I need to contact you.

To avoid SPAM, please write it like this: jessicasporndesigns (at) gmail (dot) com

Thank You!

Tuesday, March 1, 2016

Stencil Test Drive Redux #5

Welcome to the 5th Stencil Test Drive Redux!  (See all the test drives here.

GIVEAWAY ALERT!  Each month, I will give away one of the featured stencils to one lucky commenter.  Comments for the giveaway will close on Sunday at 9AM EST, and the winner will be posted in this post by Monday morning at 9AM EST, so make sure to check back!  

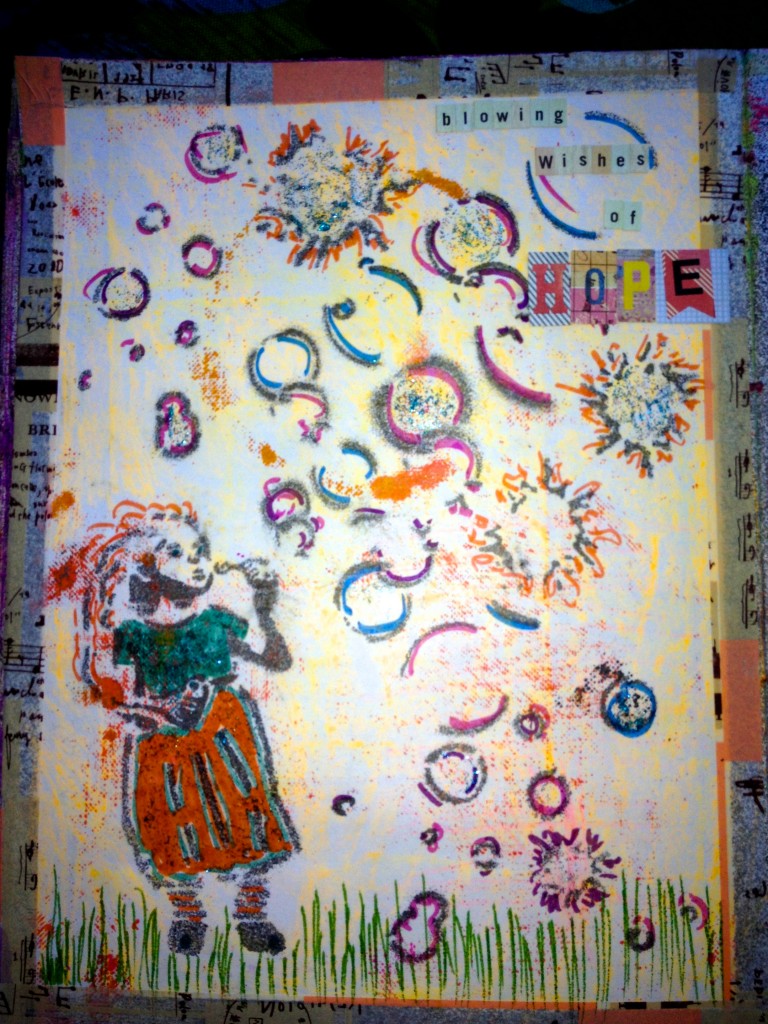
This week - a look back at the Bubble Girl Stencil Test Drive.  Here's peek at my project from that Test Drive and the Bubbles Girl stencil itself. 
  

I also love using the bubbles without using the girl - like I did in this post about using parts of stencils. 

Here are the amazing projects from the artists on that original test drive.  Click the names below the images to go to the original blog posts.  The tutorials are fantastic.


I hope you'll check out all of these posts and the great tutorials they have!  

GIVEAWAY ALERT! 
If you'd like to win one of the "Bubbles Girl" stencils, please leave your email address in your comment below!  Comments for the giveaway will close on Sunday at 9AM EST, and the winner will be posted in this post by Monday morning at 9AM EST, so make sure to check back!  

And the winner is April Dawn!  Congratulations April! I just sent you an email asking for your snail mail address so I can get the stencil to you.

And if you've used one of my stencils, make sure to send me a picture/link and let me know, so I can feature you in future posts.

If you haven't already - please connect with me here:
Your comments make me so happy and let me know you were here. I read and treasure every comment and will happily answer any questions as soon as I can.

If you are entering a GIVEAWAY, please add your email address in the event I need to contact you.

To avoid SPAM, please write it like this: jessicasporndesigns (at) gmail (dot) com

Thank You!

Tuesday, December 15, 2015

How to Make Your Own Up-cycled Wrapping Paper


I was so inspired by last week's guest posts by Corrine Gilman and Miriam Schulman.  Did you see them?  Here's how I used bits and pieces of both tutorials to make my own wrapping paper using paper bags and newsprint paper.


I used my stamps from RubberMoon with Black Archival Ink from Ranger.  Then I colored and doodled using my Posca Markers and Black Sharpie pens.


A little washi tape and cord remnants added color.

For this one, I used my Medallions stencil from Stencil Girl combined with a Hamsa Stamp, some doodling and leftover trim.


I love that the supplies were all things I had around the house, and that they look so home made and unique!


Here are some pictures from our Hanukkah celebration last week, with my mom, daughters, sister and brother in law, and my dad's sisters - the twins.

All my best wishes for a wonderful holiday season!

Your comments make me so happy and let me know you were here. I read and treasure every comment and will happily answer any questions as soon as I can.

If you don't already, please sign-up for my newsletter HERE, and follow me on Facebook, PinterestBloglovin and YouTube, so that you never miss a giveaway, and always get the latest Jessica Sporn Designs News!  


 Follow on Bloglovin

Tuesday, December 8, 2015

Guest Post: Handmade Holidays Day 2 with Corrine Gilman


Welcome to Day 2 of Handmade Holidays!  Every day this week, you'll find unique art and craft ideas.  Today, Corrine Gilman of Sparkle Days Studios has a fun gift bag idea with lots of up cycling.  Remember that every post has a giveaway, and all the comments for all the days count! 

Take it away Corrine! 


To make your gift bag, gather up some materials of your choice.

Deconstruct a paper bag.  
Cut out a rectangle 9x24

Fold up to form a 9x12 finished bag.  (Here's a template.)
(feel free to experiement with sizes that work for you)

Take some additional paper bag sections and crumple for a crinkled look.  Fold in half and glue to the bag rectangle. This provides some interest to your bag.  You could also use any other papers to trim the sides and the bottom as well.


I put together my decorative collage using more paper bag,an old envelope torn off with it’s stamp still intact, an old book page and washi tape.  I made a crumpled flower out of a coffee filter and added some punched shapes to form a center that I painted with glittery craft paints. Washi tape rounds out the trimming.  


I folded over and cut the top at an angle just to provide a visual break, punched a hole in the center and used a piece of stretchy lace to make a bow.  Perfect for a journal, book,  some art, a scarf or some mittens to fit inside.  You could even make some to give as gifts themselves for your friends and family to use later.  Happy stress free creating!
------
Thank you Corrine!  Corrine has offered to give away this beautiful brooch to a lucky commenter.  You can see more of her beautiful designs in Sparkle Days Studios Etsy Shop.


Remember, for extra chances to win, make sure to comment on all the Handmade Holiday posts!  I will pick all of the winners on Saturday morning, 11AM EST. 

Please leave your email address in your comment (like this: jessicasporndesigns at gmail dot com) to be considered for the giveaway!


And the winners are:

Corrine Gilman’s Brooch:  Lou Lou in Texas!  
Art is you Trade:  Suzie Q 23!  
Clay Ornament:  Karen!  
Hamsa Stamp:  Lisa Meyers! 
Three Trees Stencil:  Lu 

Make sure to check back for more projects and giveaways every day this week!

Your comments make me so happy and let me know you were here. I read and treasure every comment and will happily answer any questions as soon as I can.

If you don't already, please sign-up for my newsletter HERE, and follow me on Facebook, PinterestBloglovin and YouTube, so that you never miss a giveaway, and always get the latest Jessica Sporn Designs News!  


 Follow on Bloglovin